Sunday, 22 November 2015

Room by Room - Living Room

I am about to organize my living room to make it more functional.
 
The first thing I read was that before anything, consider what you do in your living room. The article made a good point. It said that even though you may not think that certain items, such as toys and LEGOs, belong in your living room, if they end up their during your family's living, it may be time to find them a home in the living room. They suggested storage ottomans.


Create a place for current projects. Instead of leaving half completed works of art sprawled across the table, you can designate a place where they will be safe until next time. It will help keep your living room clean.
 
 
Create a table to put behind your couch. This creates extra table space and can take the place of clunky side tables. You could also use it as a table, as in the picture. I am going to design one with an additional top width that is hinged on. This way I can make the table bigger when I need the space - such as for homework and crafts, but can easily make it smaller when I need the floor space.
 
 
Invest in a quilt rack or a blanket ladder. This will give your throws a home so that they aren't always taking up couch space. If you can't find one, you can always build one!
 
 
I absolutely love this next one but am unable to do it because our couch has funny shaped arms.
This organizer built a side table to go over the couches arm. This saves space by eliminating the need for side tables and it is small enough to find a place for when not in use.


Layout is key to optimizing space. Try setting up your living room in different ways to see which is better. If you don't want to move the furniture around, try making a room layout to test configurations. Visit Apartment Therapy for more ideas.
 
 
Did you find anything helpful? Share your ideas in the comments!


Saturday, 21 November 2015

Furniture Arrangement Tips

Arranging your furniture in the proper way is one of the best ways to optimize space and make a room seem bigger. I came up with a list of tips to help you configure your furniture the best way possible. 

First, think about what the room is going to be used for, from all aspects, so that you know what kind of furniture you need to have to optimize the space.
 
Determine the focal point of the room and organize furniture around it. Your focal point may be a fireplace, television or piece of art.
 
 
Keep walkways to other rooms clear. When placing your furniture you want to be sure that you and your guests are not zigzagging through the room.
 
 
If a room, such as the living room, has several purposes, divide your room into mini rooms. The room will still be open but will seem larger because of the designation of functional spaces.
 
There are also a bunch of articles regarding optimal furniture spacing. I have included a selection below but for more information I suggest reading The Ultimate Decorators' Guide to Ideal Living Room Layout Measurements at Apartment Therapy.


Coffee table and sofa - 14 to 18 inches
Space between furniture - 30 to 36 inches
Distance between seating - 3 to 10 feet
Distance from television to sofa - 1.5 to 3 times the diagonal size of television


Lastly, when placing your furniture into the room, place the largest items where you want them first, then organize the smaller items around it.
 
If you aren't sure where you want everything and don't want to repeatedly lift your furniture, try making a room layout, to test room configurations, first!

Organizing your Car

If you are anything like me, your car doesn't stay clean for long. I am constantly trying to figure out where to put my groceries while still having what I feel is essential to have in my car such as jumper cables, a change of clothes, seasonally appropriate attire and an emergency kit. I am sure a lot of my space problems have to do with the fact that I use my car as a toilet paper storage facility because I don't have room for it in my home (I tend to over buy when it is on sale). Bonus - if you are ever with me on a road trip, you don't have to use a leaf.
 
The first idea seems like it would be great for anybody who has kids. I find trips, with the children in my life, go much better when they have something to occupy their time. By installing a shoe organizer to the back of the front seats, you provide ample storage for your kids road trip goodies. It also provides extra space for storing car necessities.
 
 
To help reduce the spread of garbage and keep your car tidy, invest in a cereal container to use as a garbage can. Store garbage bags at the bottom of the container so that you always have one when it is time for a new one. This method makes it easy to quickly remove trash from your vehicle.
 
 
Use silicon cup cake liners in your cup holders to help catch crumbs and drips. It also makes it easier to clean out your cup holders, just remove the liners and clean.
 
 
To avoid making your trunk a giant pile of stuff, invest in an organizer. You can get ones in all shapes and sizes or get custom ones made specifically for you trunk. I really like the stretchy mesh that you strap to the underside of the trunk door or across the front/back of your trunk. They help keep items such as umbrellas and sporting goods easy to access while assisting you to keep the main trunk area clean.


Or try your hand at making a fold open shelf to help separate the items in your trunk. Visit Instructables for directions on making your own.
 
 
Use a small accordion file folder or binder in your car for all your important documents and receipts you may need later. This keeps everything in one place but also reduces the likelihood of receipts being lost under the seat or thrown away.


Let me know, in the comments, how you keep your vehicle organized! 


Using Empty Mint Tins to Organize

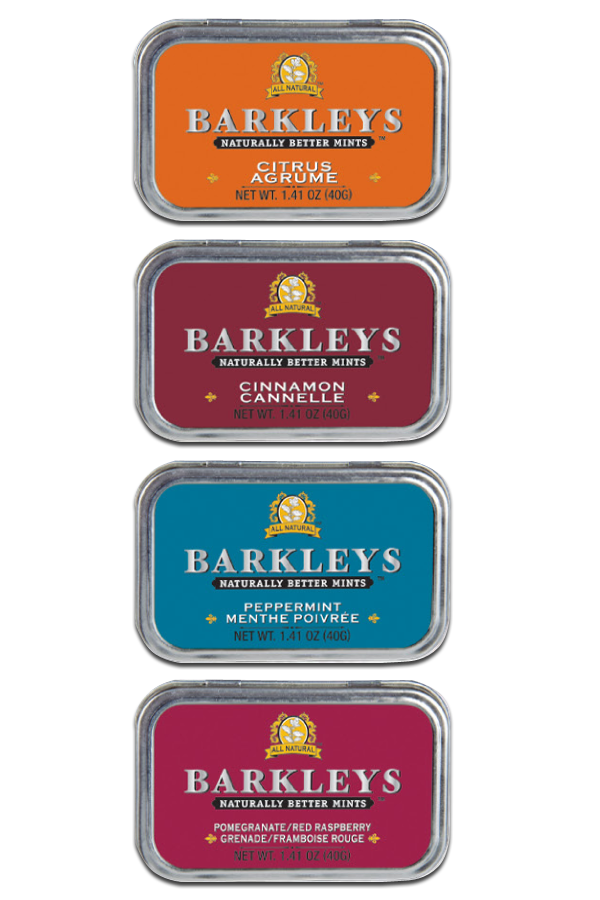
I love Barkley's Mints. They are delicious and they come in these really great tins - like Altoids.

I always keep them because I plan on doing something with them and last night I found some really great ideas on Pinterest.


The first idea was to use it as a mini first aid kit for your purse, pocket or backpack. You can put in items like self-adhesive bandages, alcohol wipes, cotton swabs, tweezers and baggies with your medication. One crafter even added emergency contact information.


Similarly, some were repurposed into sewing kits for your bag. These kits included needles, safety pins, seam ripper, thread, buttons, thimbles and mini scissors. This would be great for travelling and to have on hand for emergency fixes. Maybe include a sample bottle of clear nail polish for torn nylons.

I also liked the idea of using it to keep everyday purse items in one spot. That way you don't have to dig to the bottom trying to find them. Some of the tins I saw included items from the above ideas as well as mini nail files, nail clippers or a utility knife.

 
You can even make one for that outdoor explorer in your life.
 
 
Have you repurposed a mint tin lately? What would you use it for?


Organize your Scrapbook Supplies

This post is close to my heart because I love to scrapbook and love buying scrapbooking supplies just as much. I explored the internet and found all these great ways to store your scrapbook supplies.


Sticker Binder
My stickers are currently in a bin all mixed together. The sheets are different sizes and they are in no discernible order. I found a scrapbooker who stores their stickers in a binder using page protectors. I thought this was a fabulous idea because you can see what you have, can easily move them around depending on what order you prefer and add pages whenever you get new sheets of stickers. It will also prevent them from getting bent and crumpled.


File your Paper
Use a filing cabinet or filing tote to organize your scrapbook paper by colour and event. If you are a sewer as well, you can use another section of your filing cabinet to file your fabric. Check out our post on organizing your sewing room for more information.


Hang your Paper
If you have an unused closet in your crafting area, put your paper, stickers and embellishments in large Ziploc baggies and use pant hangers to hang the items up. This makes great use of space you already have and makes thing easily accessible and viewable.


Washi Tape Shutter
This scrapbooker used an old shutter to organize her washi tape. I love how she put a little piece on the shutter after she organized them. This helps keep everything the same way you found it and you can be sure you know what has run out. If you want instructions on making your own shutter, visit Crafting in the Rain. Keep in mind, you don't have to use an old shutter. A piece of wood, bulletin board or even the wall could work.


Embellishment Box
Organize your embellishments in coordinating boxes that are laid out in a shallow drawer. To remember what is in them, label the boxes. Even better, do what this scrapbooker did and glue one of the embellishments to the lid.


Embellishment Spice Rack
You can also store your embellishments in an old spice rack using old spice jars or containers that would fit instead. I picked up containers, like the ones in the picture, at the Wholesale Club. You can get an old spice rack at a garage sale or thrift store.

Peg Board
Organize your scrapbooking stamps, scissors and other tools on a peg board. You can buy all sorts of hooks, rails and baskets to fit your needs. You can also outline the objects and draw images of the stamp or scissor blade so everything goes back where it started. Similar to the washi tape, it makes sure you know where everything is and if it is missing. This is also helpful if you share your space with another scrapbooker.


Keep watching for more helpful scrapbook storage! Comment below!

Friday, 20 November 2015

After Organizing My Bedroom - Part 1

So my bedroom is on its way and I wanted to show you some of the progress!
 
The Afters
 
I absolutely love the new layout and colour. The room seems so much bigger and I believe it is only 10' X 10', so that is saying something. Configuration and colour are definitely important aspects of making a small space larger.
 
 
You may notice my colourful cart by the TV. This is full of crafts - lots of them. I got it from Michael's and it was a bit pricey but I had a coupon and it is perfect for my most often used crafts! The bed also has two new drawers under it - I took these from the big black dresser I got rid of and it was a surprisingly perfect fit.
 
It does still look a little bland but that is because I still have a bit to do. I have a shelf to put above the bed which will display some of my treasures and superhero themed bobble heads. I also have some artwork, I picked up at the Toronto Fan Expo, to decorate the walls - the Avengers, Captain America and Indiana Jones I believe. The mirror behind the chest is the one I plan on using for my storage mirror - see Jewellery Storage without the Box.
 
You will also notice that the after photos do not include pictures of the shelving unit. It is still there but that is part of what is left to do, along with putting some sort of covering up behind the dresser to hide my DIY jewellery box artwork. I also want to hid the TV wires in some sort of white tubing.
 
I hope the transformation inspires you to transform something in your small space!
I will keep the After Photos coming!
 
Let me know what you think!


Sewing Room Organization

File your Fabric

This is a great idea for storing your fabric in a way that is easy to see. There is nothing worse then having to dig to the bottom of your fabric bin only to realize the one you wanted is somewhere else.
To learn how to file your fabric visit The Thinking Closet.
 
File Your Fabic - Get Organized
 
 
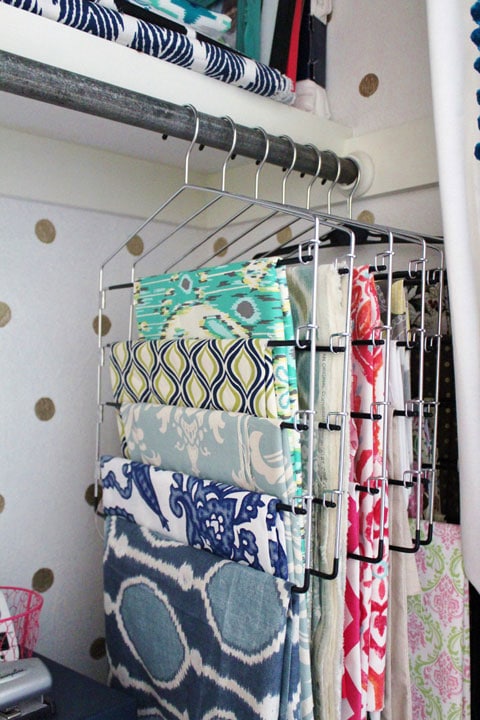
Hang your fabric
 
This method uses pant hangers and also allows you to see what fabrics you have in an accessible way. It also takes advantage of the closet you already have and may not use.
 
Use Pants Hangers to store fabric - I Heart Organizing


Thread board
 
Thread boards are a great way to store your thread and take advantage of unused wall space. You can purchase a thread storage unit similar to the one depicted or you can make one using a small dowel for the pegs.


Keep Your Spool and Bobbin Together
 
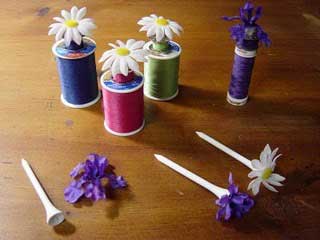
No more digging through your basket of thread for the right colour bobbin. Use golf tees, decorated if you like, to keep spools of thread with their coordinating bobbin.
 
Golf Tees for Bobbins/Thread - Pickup Some Creativity
 
Organize Your Patterns
 
I find the hardest part about dealing with patterns is trying to get them to fit back into their sleeve. This crafty organizer used a binder with page protectors to display her patterns. The best part is, you don't have to cram it back into its small paper sleeve. Just slide it into the page protector.
 
 
Use a Spice Rack for Buttons
 
I personally use plastic bags to organize my buttons but this is a fun and clever way to store buttons by size, colour or type.
You can usually pick up an old spice rack from a garage sale or a thrift shop.


Ribbon
 
An insanely easy trick to turn a slotted tupperware bin into a ribbon organizer.
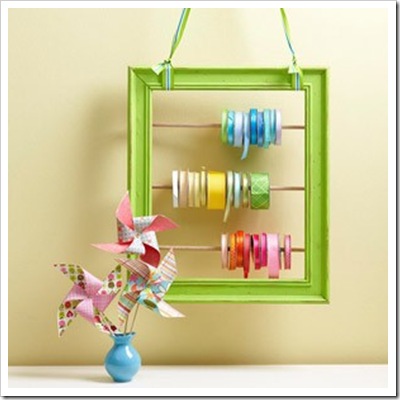
There are many ways to store your ribbon so I am sharing a few of my favourite. The basket idea to the right is cheap and easy to do. It also stops your spools from running away from you while trying to cut a piece. The bottom left could be an easy DIY using and old frame and skinny dowel - you can use any leftover dowel to make the thread holder. The lower centre is good for once your ribbon has run down - use TicTac containers to store it. The last idea uses a paper towel holder to make ribbon viewable and accessible.
 
131378514099441712_arz2Dbu8_cTic Tac fan? Save up extra containers to use as ribbon dispensers.Paper towel holders can easily become ribbon and ric rac holders.
 
Clothes Pegs for Embroidery
 
There is very few things as frustrating as detangling your embroidery thread. This idea is a great way to stop tangling and has a fun look to it.
 
Wrap embroidery floss around a clothespin to keep it from getting tangled.
 
 
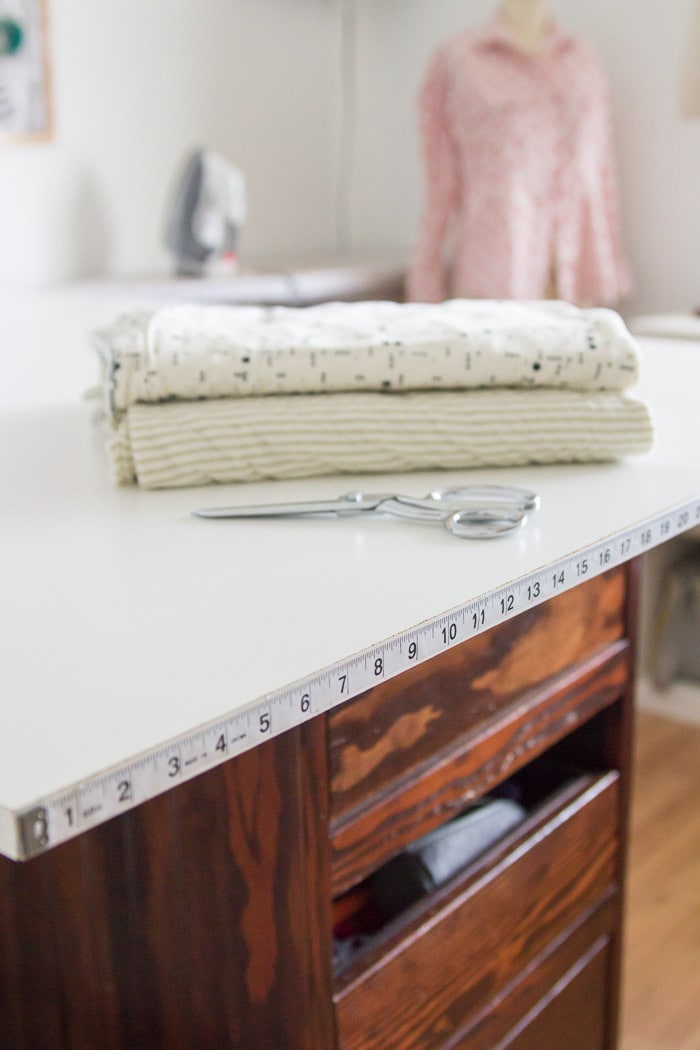
Make your Own Cutting Table
 
This idea seems really obvious now that I have found it but I never would have come up with it myself. This is a great way to quickly cut the size of fabric you need for your project and also adds a touch of novelty to your sewing room.
 
 Genius! Glue a measuring tape to the edge of your cutting table - More great ideas at Melly Sews
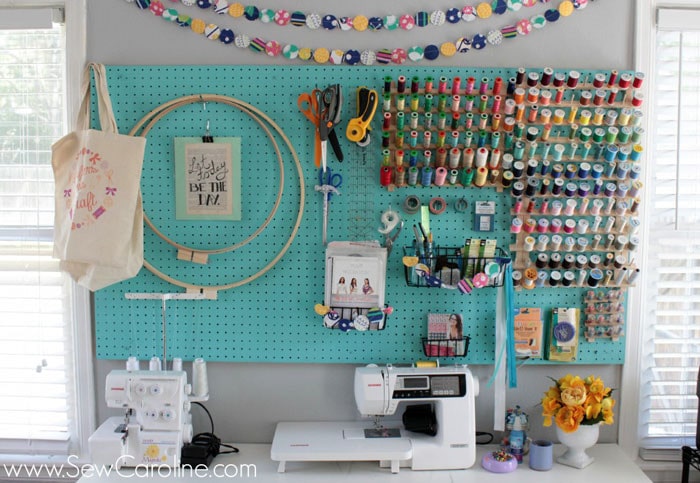
 
 
Peg Board
 
Last, but certainly not least, is our trusty peg board. This idea is probably one of the most versatile organization ideas I have found and I think it looks great painted in a bright colour like below. I don't have enough wall space to try this but if I ever do I definitely will be adding this to my small spaces!
 
Sewing room pegboard - Sew Caroline